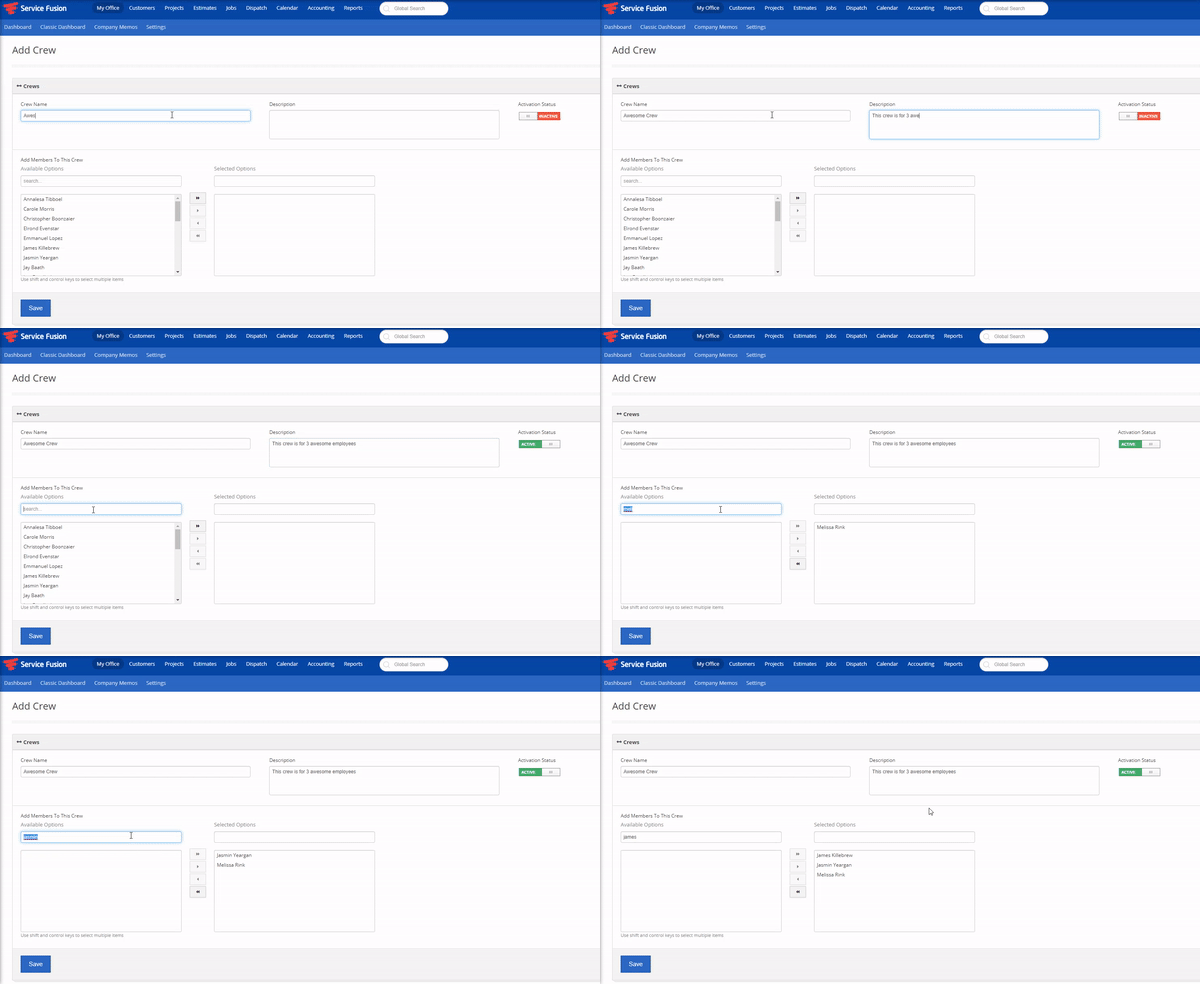
Crews offer a way to group employees together, for quick filtering on the Dispatch Grid and Calendar.
To create a Crew, navigate to My Office > Crew Management.

To view, edit, or delete an existing crew, select the appropriate button under Actions.
To create a new Crew, select the +Add New button on the top right.

Enter the name of your Crew in the Crew Name field. You can create Crews based on any criteria you wish, but some common criteria are location (zip code or city), level of employment (helper, technician, team leader), or even specialty, if your business serves multiple industries (plumbing, HVAC, cleaning, roofing).
You can then enter a description if you wish; it is not required.
Be sure to change the Activation Status from INACTIVE to ACTIVE.
Then, select which employees belong to this Crew. Move the employees from the Available side on the left, to the Selected side on the right, using the arrows in the middle.
The same employee may exist in multiple Crews. For example, in the above screen shot, James is in both the Dallas North Team, and the Awesome Crew. Melissa is also in both the Dallas North Team and Awesome Crew, and Carole is in both the Dallas North Team, and Drain Cleaning Crew.
There is no limit to how many employees can be in a Crew, or how many Crews an employee can be in.

When you have added all the employees you need to the Crew, select the blue Save button at the bottom of the page.
After your Crew is saved, you can filter by Crew on the Dispatch Grid and the Calendar. To do so, on either the Dispatch Grid or Calendar, simply click Set Filters, select the Crew, then click Apply Filters.
