- Customer:
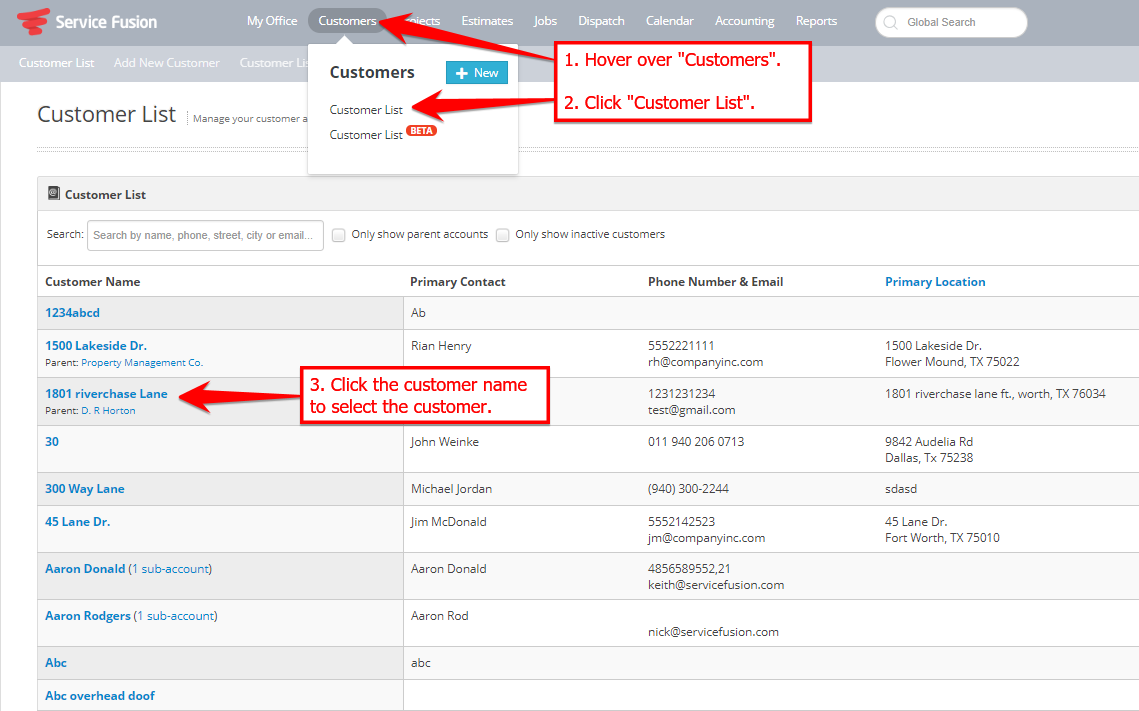
- Navigate to the customer you would like to add a document to by going to your customer list and clicking the name of the customer.
- Click the “Documents” under the customer name at the top of the screen, then either drag and drop the documents into the box or click the
 button to manually browse for and add the documents.
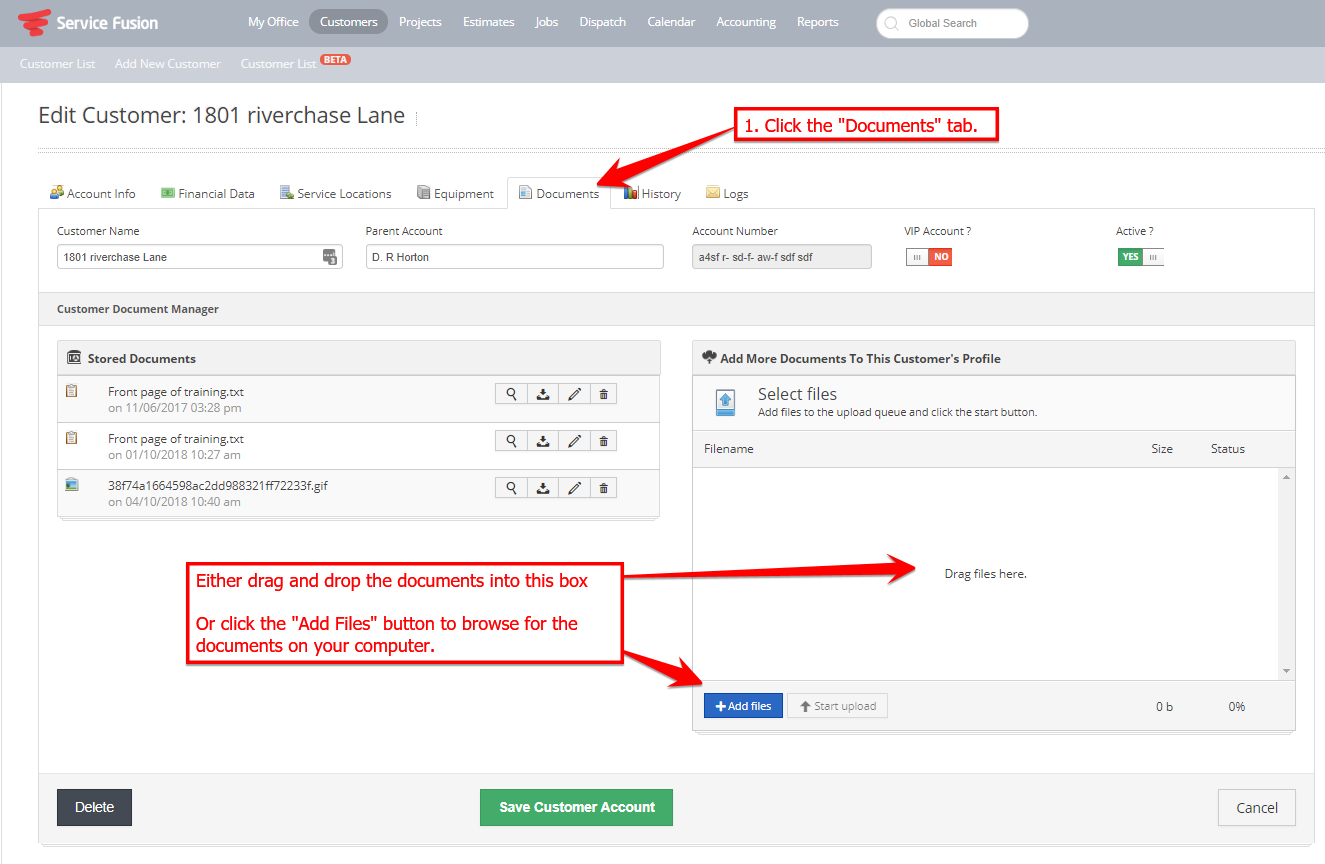
- The documents will appear in the box as shown below. Click the
 button to upload the documents to the customer’s profile and it will appear on the “Stored Documents” list.
- Click the
 button to save the customer’s profile.
============================================================
- Job:
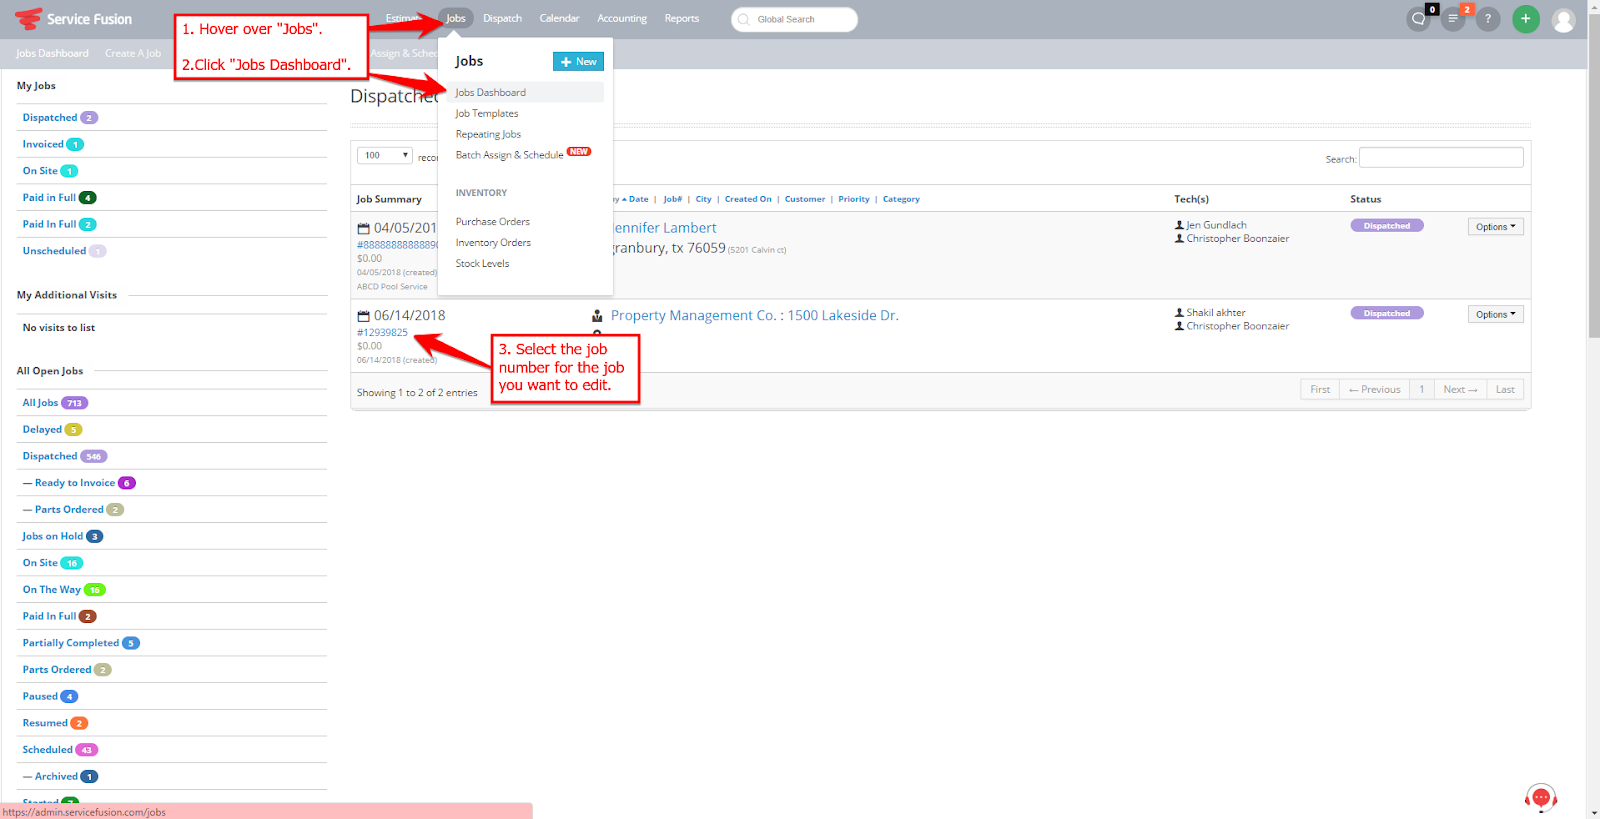
- Navigate to the job you would like to add a document to by going to the “Jobs Dashboard”, finding the job you want to edit, and clicking the job number under the date.
- Click the “Docs” tab, then click the
 button at the top of the “Details” box.
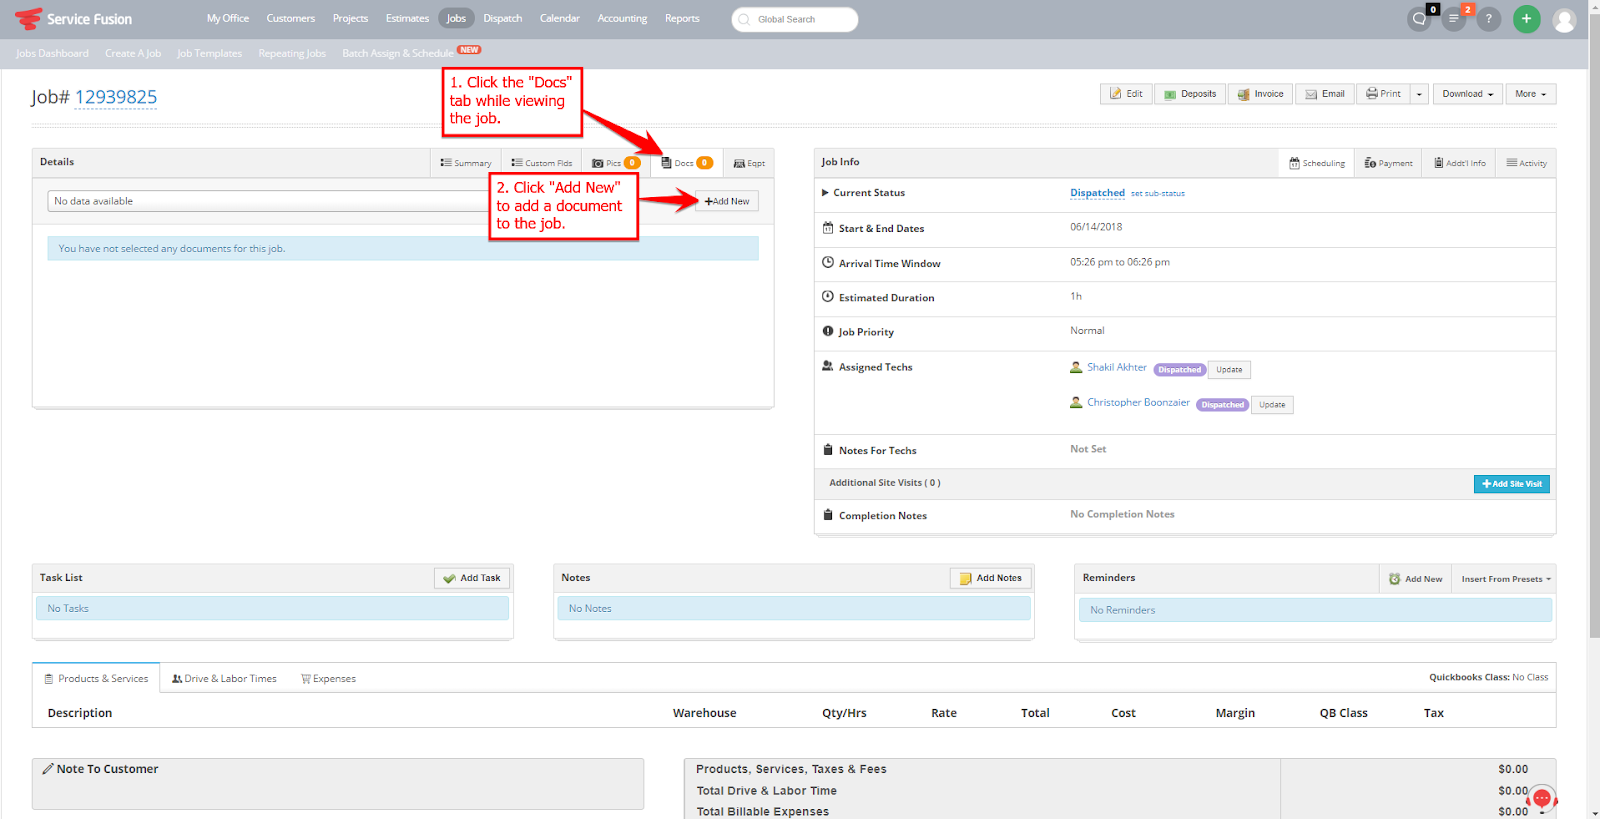
- After choosing “Add New”, The below window will appear. You can either drag and drop documents into the uploader or click the
 button to queue up documents to import.
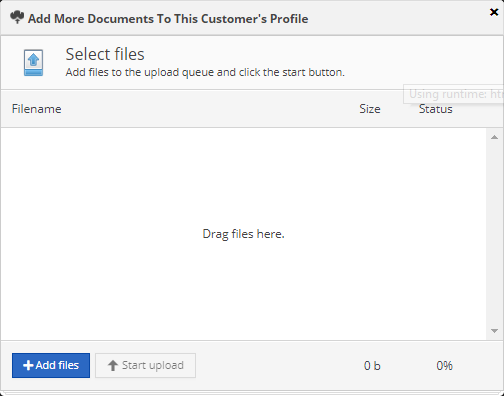
- After adding your documents to the queue, click the
 button to add the documents to the job. You should now see the document on the customer’s job. This will upload the document to the customer's account as well.