Create purchase orders, print them and email them.
We have added a purchase order functionality to the system.
Go to My Office > Company Preferences and look for "Personalize Product Description On Purchase Orders" to choose which fields from the product form you'd like to include on PO's.

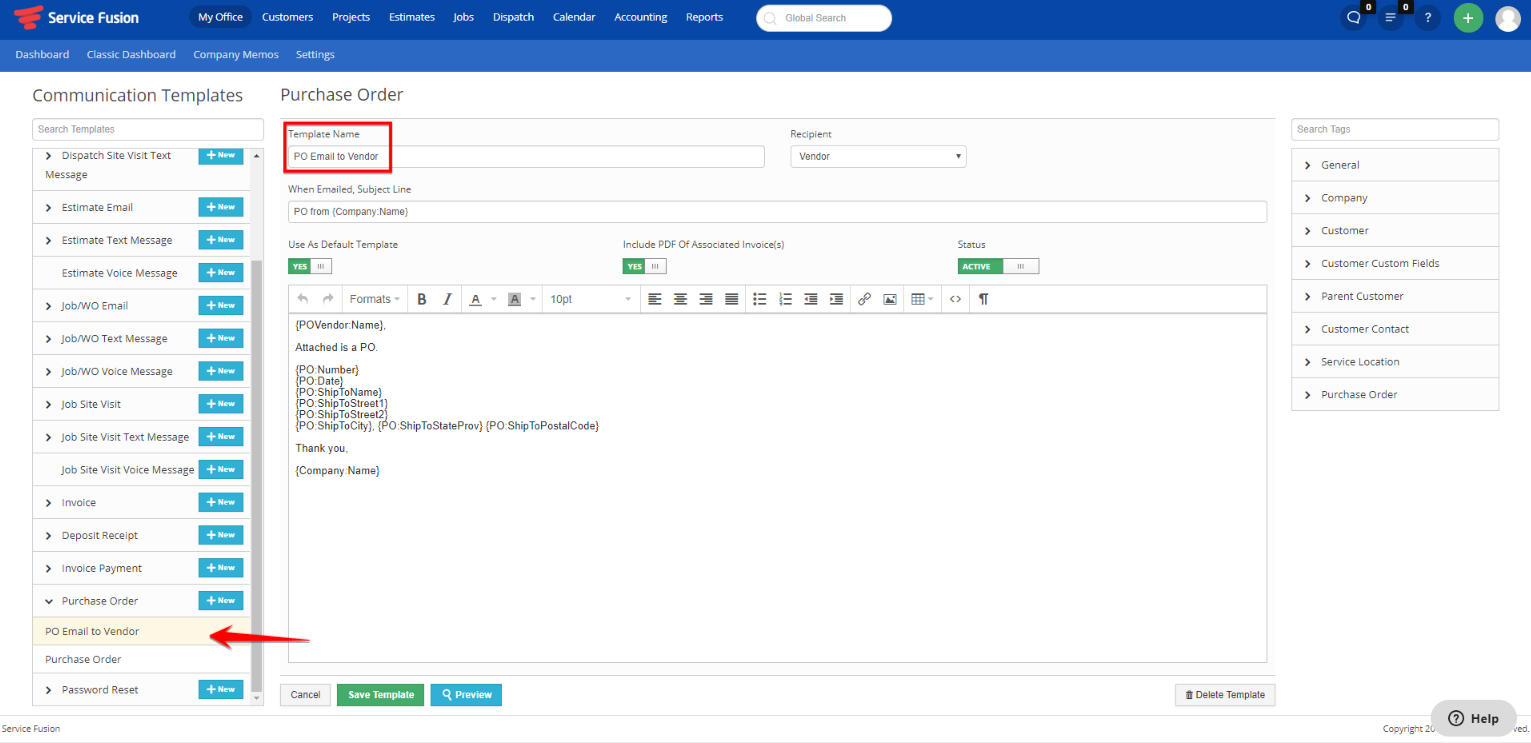
Modify your default Email template for PO's. Here is an example of one that we called "PO email to Vendor" but of course you can customize one the way you like in My Office > Communication Templates.
There are two ways to create PO's: from the Job directly, or from the Purchase Order screen.
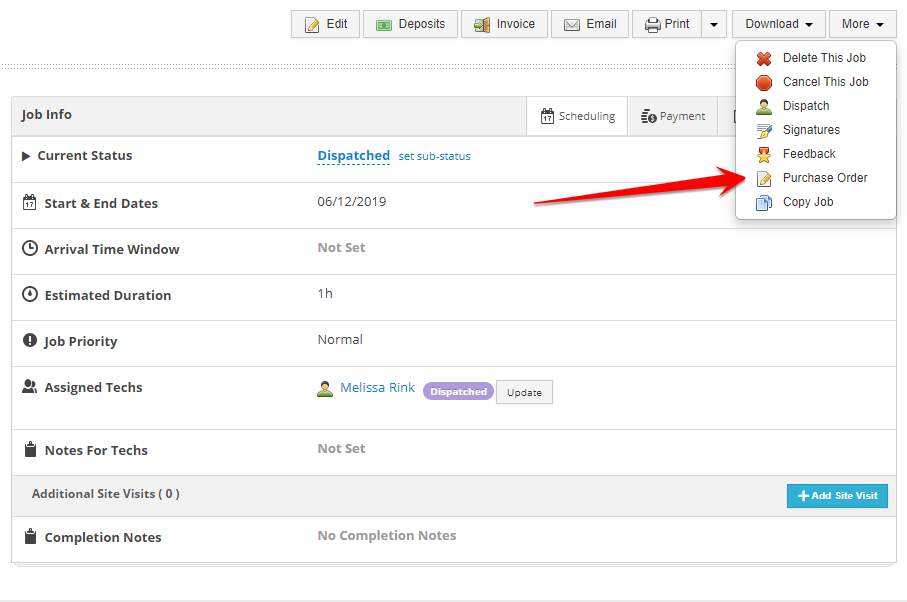
To add the PO directly to the job, you can click on the More menu and then choose Purchase Order.
If you have products on your job already, the system will prompt you to add these to your Purchase Order automatically. If you do not have products, there is a field to add them:
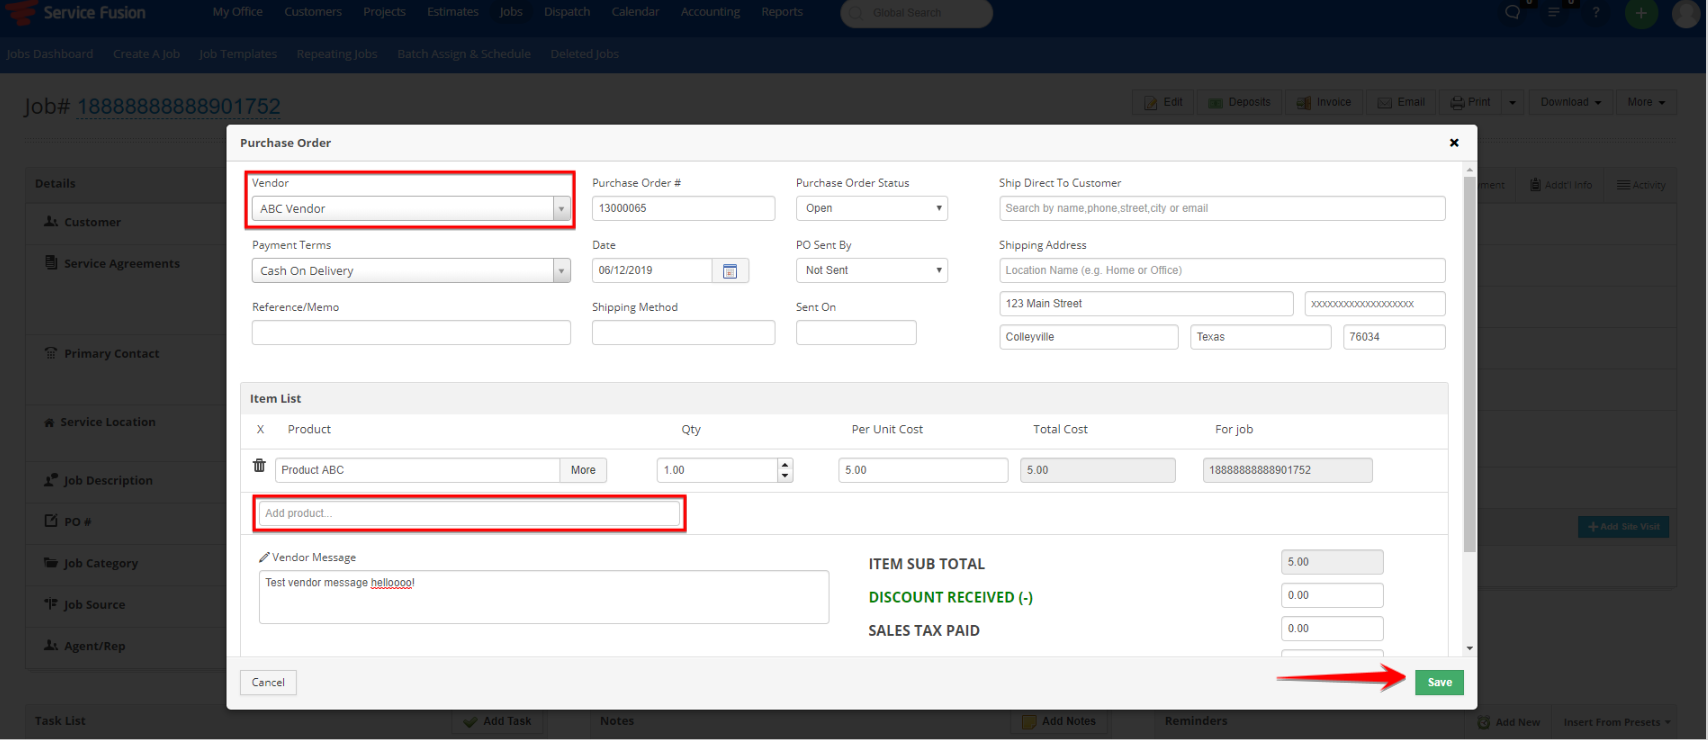
You must select a vendor from the list. Purchase Order numbers will automatically populate, increasing sequentially by one from the last PO. Upon saving the PO, it will be visible on the job screen, above Products and Services. Clicking the More button on the right will give options to Print the PO (to mail or deliver) or Email the PO to the vendor. You can also delete the PO if it was made in error.

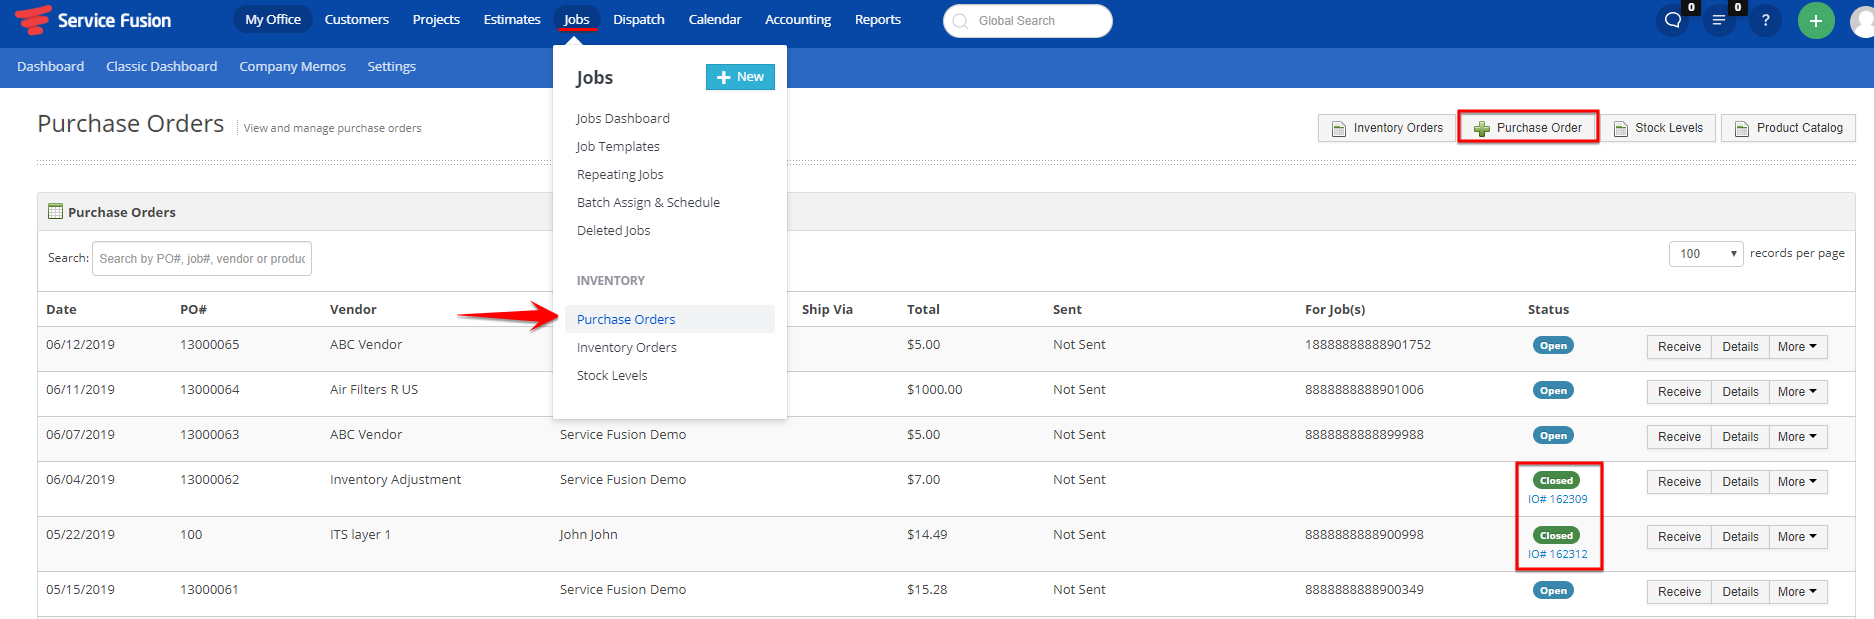
Alternatively, you can create a PO by going to Jobs > Purchase Orders.
From here, you can create a new PO, which works exactly like the above. You can also view if the PO has been received and is in the closed status, and the link to the Inventory Order (IO) created upon receiving the PO is linked below the status indicator.